
CentOS 7 configuration
- You can start your configuration by setting SELinux to permissive mode (prints warnings instead of enforcing the security policy)
# sed -i -e 's/^SELINUX=.*/SELINUX=permissive/' /etc/selinux/config- Allow the vagrant user to use sudo without needing to provide a password
# echo "vagrant ALL=(ALL) NOPASSWD: ALL" >> /etc/sudoers- Create a .ssh folder, for your vagrant user, so that ssh keys and informations are stored there
# mkdir -m 0700 -p /home/vagrant/.ssh- You can set up the ssh public/private key provided by Vagrant, with the following command
# curl https://raw.githubusercontent.com/mitchellh/vagrant/master/keys/vagrant.pub >> /home/vagrant/.ssh/authorized_keysNOTE: Confirm you received data, otherwise you’ll have problems when running vagrant up
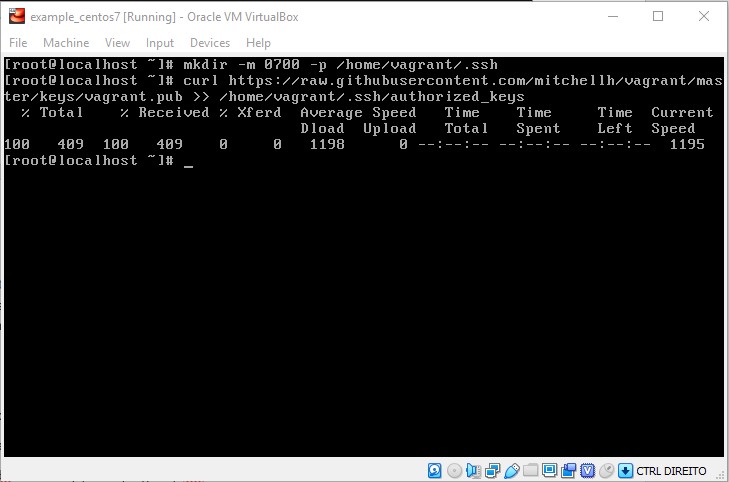
Figure 1: Retrieving keys
- Change permissions on authorized_keys file to be more restrictive
# chmod 600 /home/vagrant/.ssh/authorized_keys- Change ownership of the .ssh folder to your vagrant user and group
# chown -R vagrant:vagrant /home/vagrant/.ssh- Change the following settings for GRUB to make the boot faster
- Don’t display any menu and boot immediately
# sed -i -e 's/GRUB_TIMEOUT=5/GRUB_TIMEOUT=0/' /etc/default/grub-
- Set the default menu entry to 0 instead of saved (saved may not be available in all situations)
# sed -i -e 's/GRUB_DEFAULT=saved/GRUB_DEFAULT=0/' /etc/default/grub- Rebuild grub configuration file
# grub2-mkconfig -o /boot/grub2/grub.cfg- Perform a system update using
# yum -y update- Clear the tmp folder
# rm -rf /tmp/* - Clean the system with
# yum clean all- Clean up history
# history -c- And you can finally shutdown the machine
# shutdown -h now
Box your VM
- To be able to use your newly created VM with vagrant, you need to box it. To do so, open a terminal and go to a folder of your choice. The package will be created there. Execute the following command (specify –output if you want to provide a different name for the box)
vagrant package --base [VM name you just created] --output [name for your box]

Ex.: vagrant package --base example_centos7 --output example_centos7.box
- If you go to the selected folder, you will see the box you just created

- If you list the boxes available for vagrant, you won’t see the one you just created
# vagrant box list- You need to add the box to the list
# vagrant box add [path to the box file] --name [name you want to have for your vagrant box]

Ex.: vagrant box add c:\workspace\example-centos7\example_centos7.box --name example_centos7-box
- If you list the boxes available now, you should see your box on the list
![]()
That’s it
…and everything is set. You now have your own CentOS 7 box, that you can use to distribute and add additional configurations/tools using Vagrant.
Sources:
https://medium.com/@gevorggalstyan/creating-own-custom-vagrant-box-ae7e94043a4e
https://softwaretester.info/create-vagrant-box-centos-7-virtualbox/
https://linoxide.com/linux-how-to/setup-centos-7-vagrant-base-box-virtualbox/